Measure a floor plan in 5 minutes
PlanTape reads a floor-plan PDF, finds the rooms for you, and gives you floor area (m²) and internal wall perimeter (m) per room, ready for flooring and skirting quotes.
1Upload the floor plan
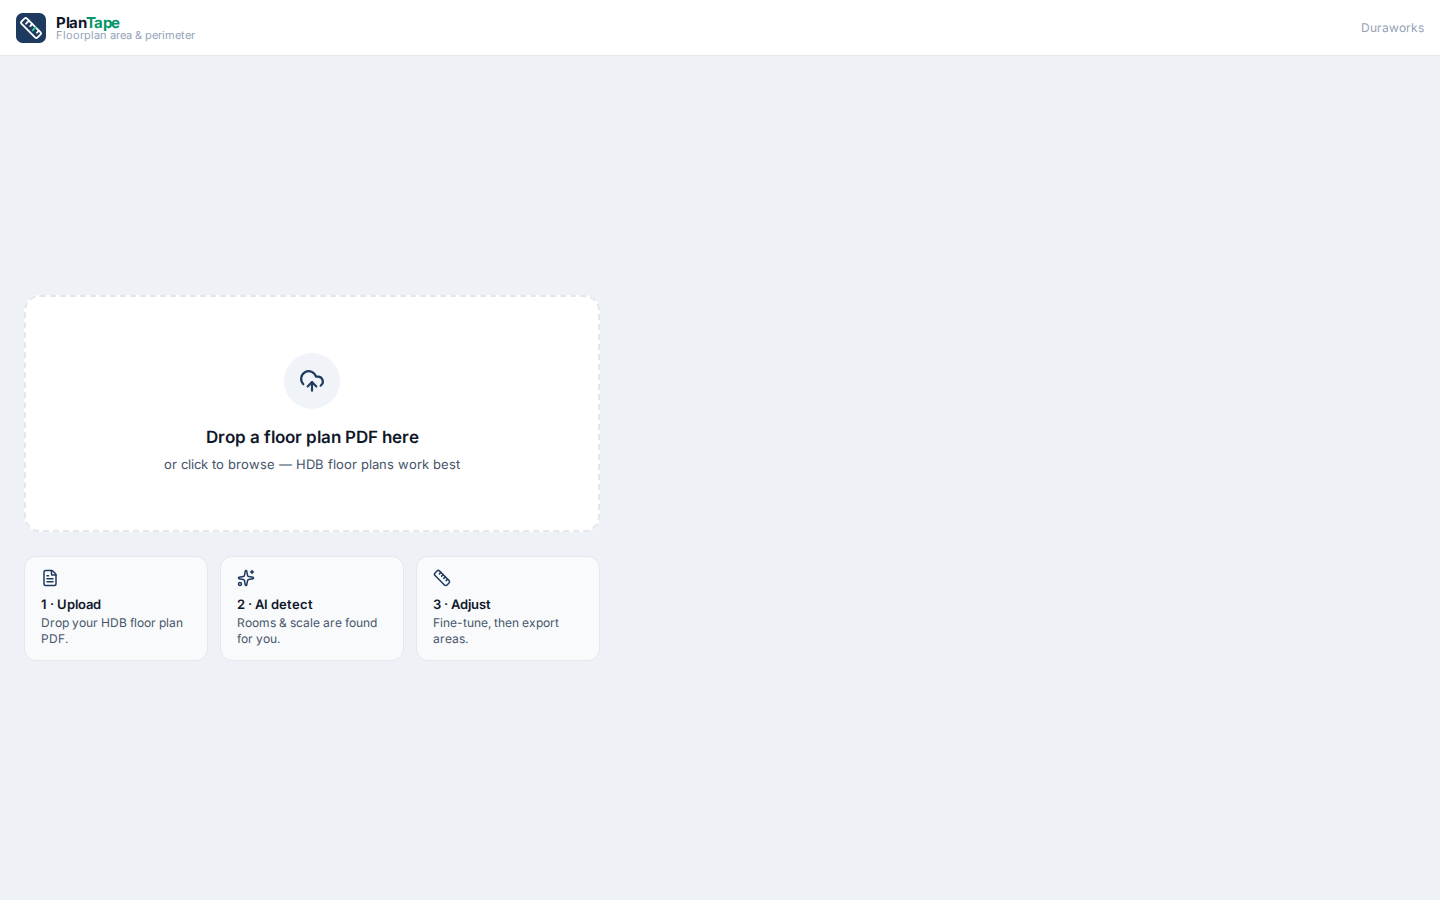
Sign in, then drop the PDF anywhere on the upload box (or click it to browse). Original floor plans work best: the kind with dimension numbers like 3000 printed around the walls. Any plan with at least one printed dimension works.
2Detect rooms, then sanity-check
Detection starts automatically after upload (the Detect rooms button shows a live counter; a run takes roughly 20–60 seconds). When it finishes, every room is outlined and labelled with its area, and the room list on the right shows both area and perimeter per room, plus totals at the bottom.
3Verify the scale (most important step)
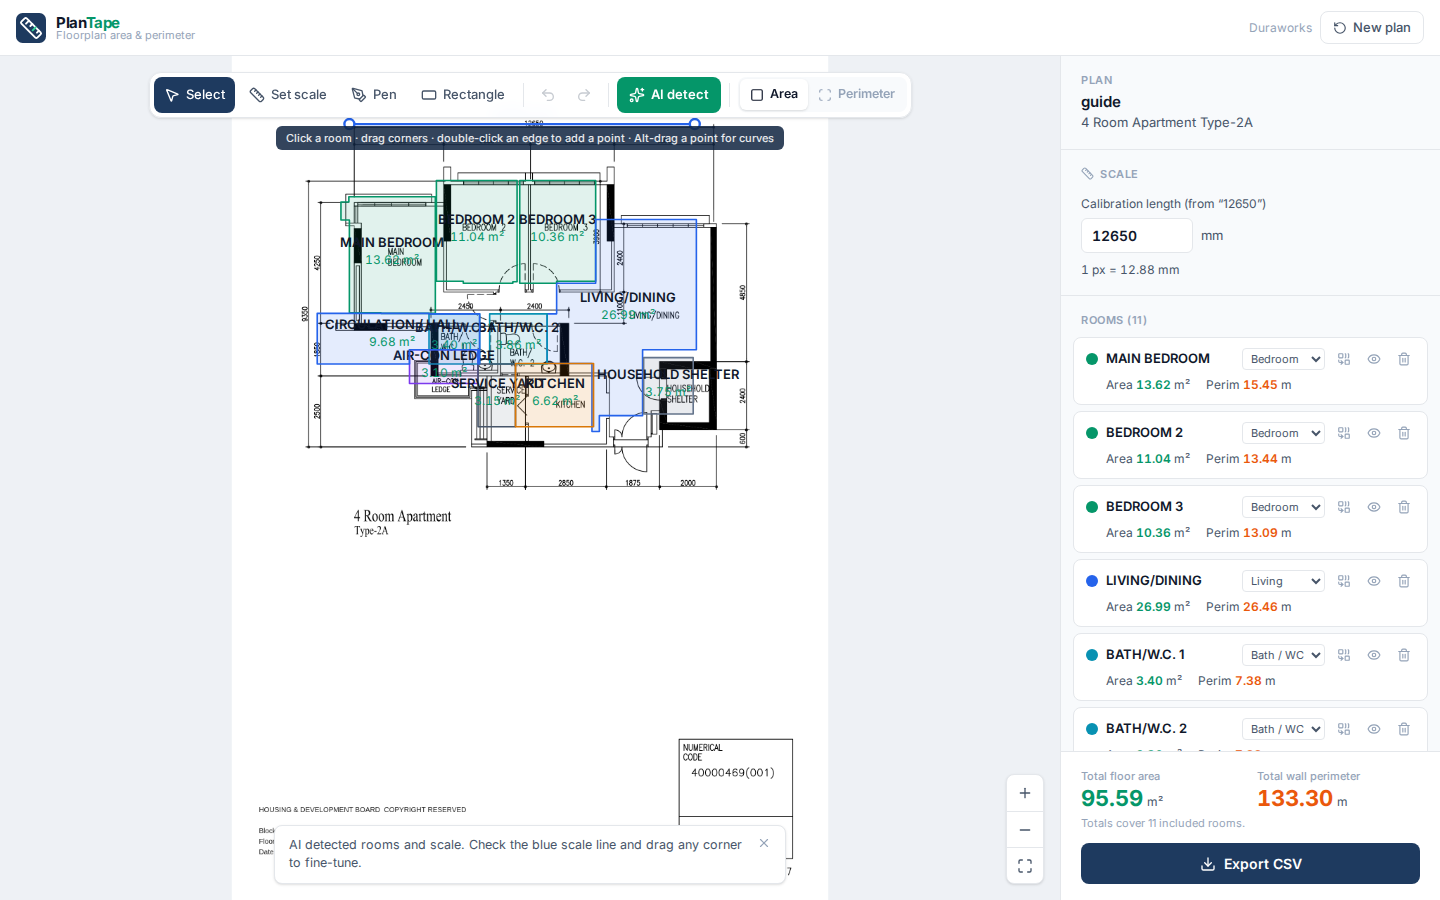
Every number comes from one thing: the blue calibration line and the length you tell PlanTape it represents. Detection anchors it to a printed dimension automatically, but you should check both ends sit exactly on the dimension ticks. To redo it yourself:
- Click Set scale in the toolbar (or press S).
- Drag a line along the longest printed dimension you can find, end tick to end tick.
- The length box focuses automatically; type the printed value in mm (e.g. 16000) and you're done. All areas update instantly.
4Fix room shapes
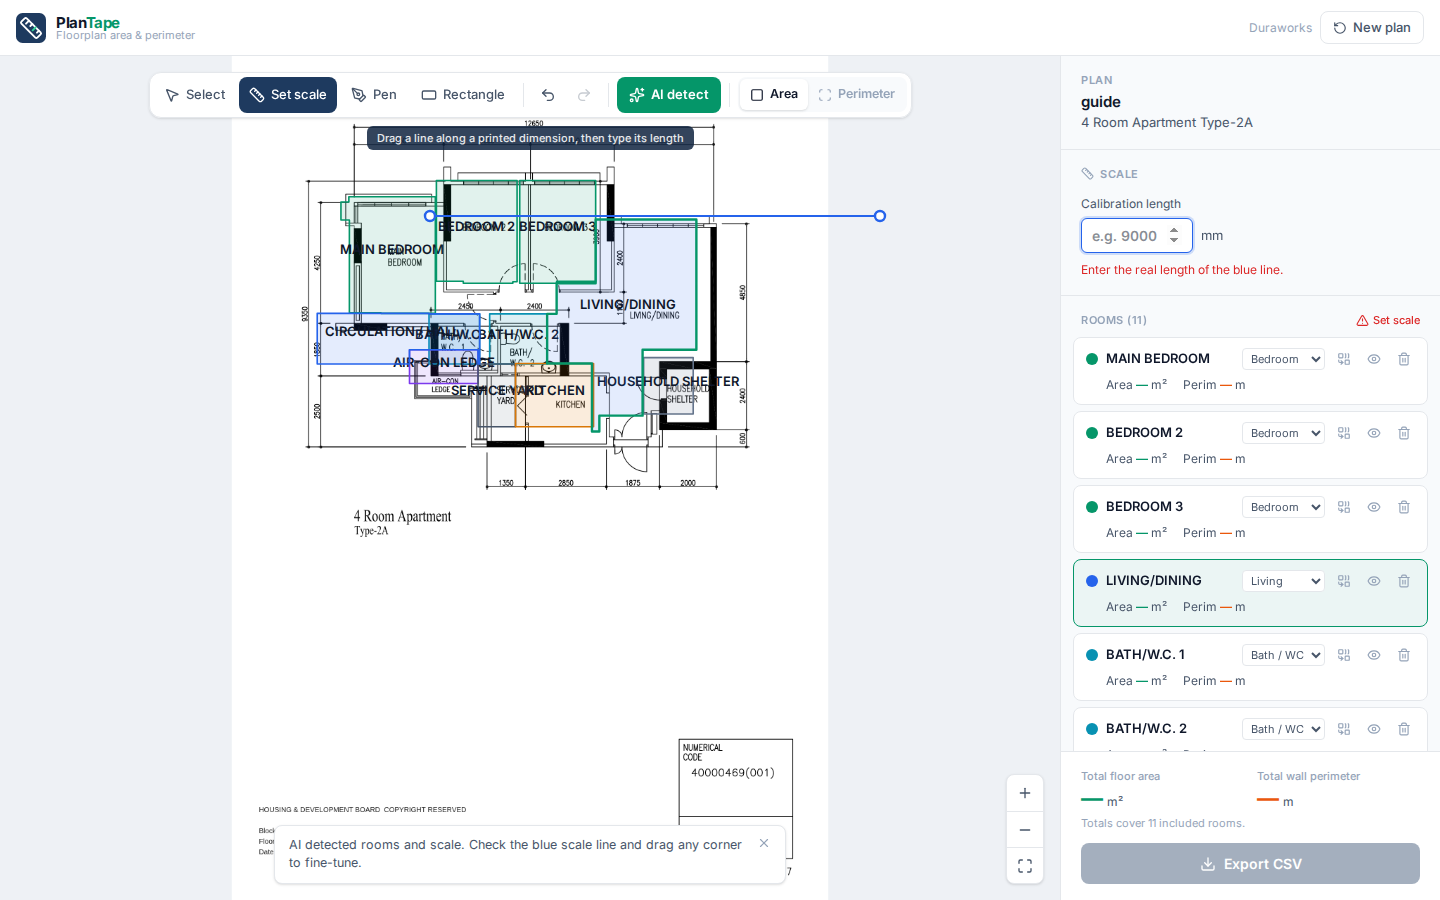
Click a room with the Select tool (V) and its corners appear as small squares. It works like Illustrator:
| To do this | Do this |
|---|---|
| Move a corner | Drag it; it snaps to align with nearby corners (pink guide lines) |
| Add a corner | Double-click on the room's edge where you want it |
| Remove a corner | Double-click the corner |
| Curved wall | Alt-drag a corner to pull out curve handles; drag a handle to bend |
| Nudge precisely | Click a corner, then arrow keys (Shift = ×10) |
| Move the whole room | Drag the room's body while it's selected |
| Undo any mistake | Ctrl+Z (redo: Ctrl+Shift+Z) |
5Add missing areas & merge
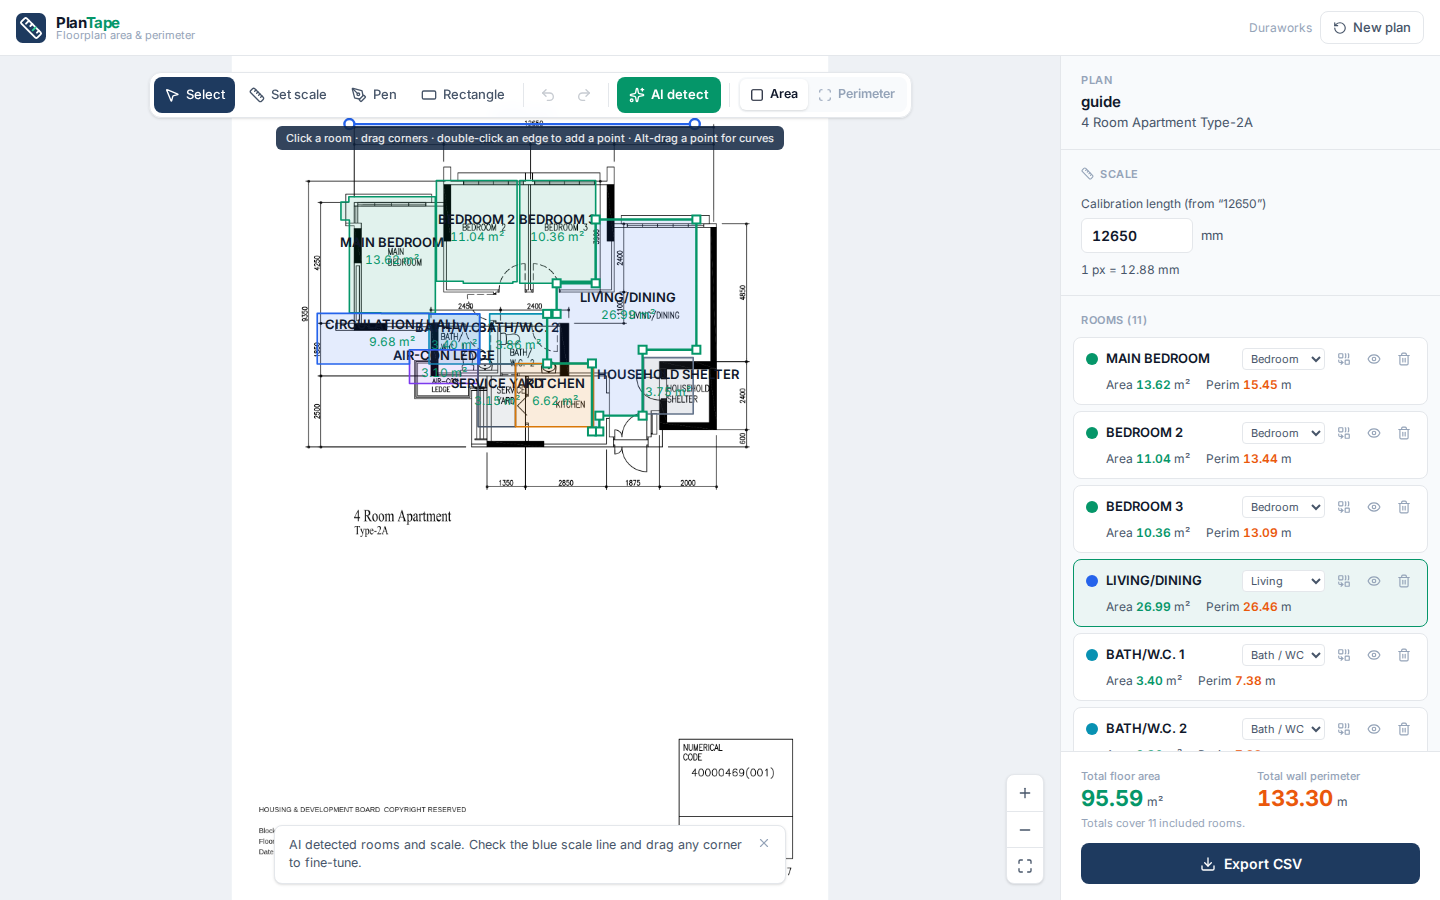
If detection missed a corridor or bay, don't fight the polygon. Add a shape and merge it:
- Rectangle tool (R): drag a box over the missing floor. For odd shapes use the Pen (P): click each corner, click the first point again to close (click-drag while placing a point makes a curve).
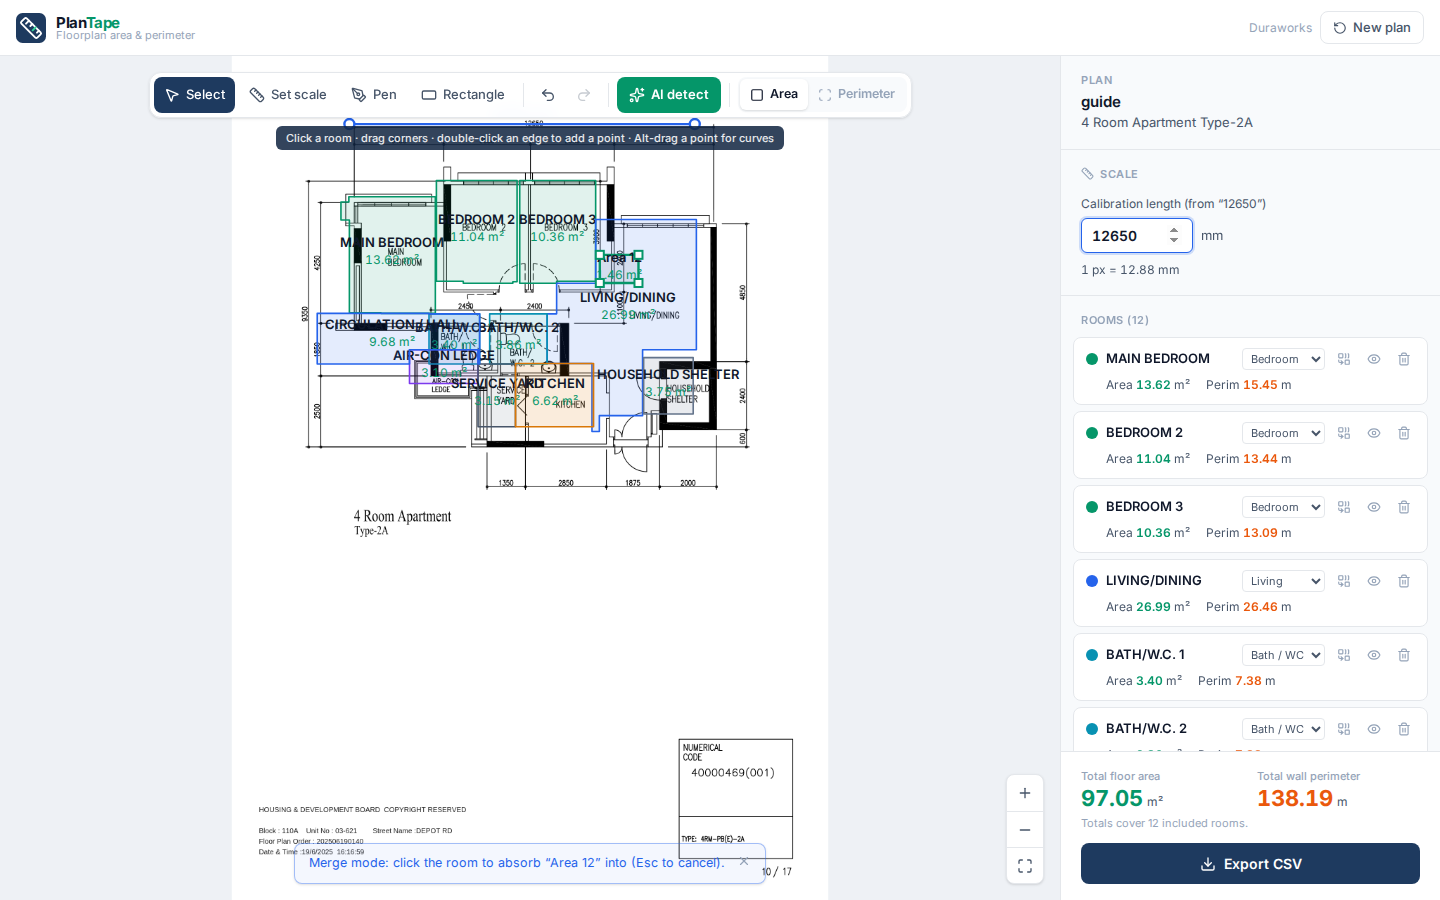
- In the room list, click the merge icon (⧉) on the new shape's row.
- Click the room that should absorb it. The two become one outline; overlap is not double-counted.
6Area vs Perimeter view
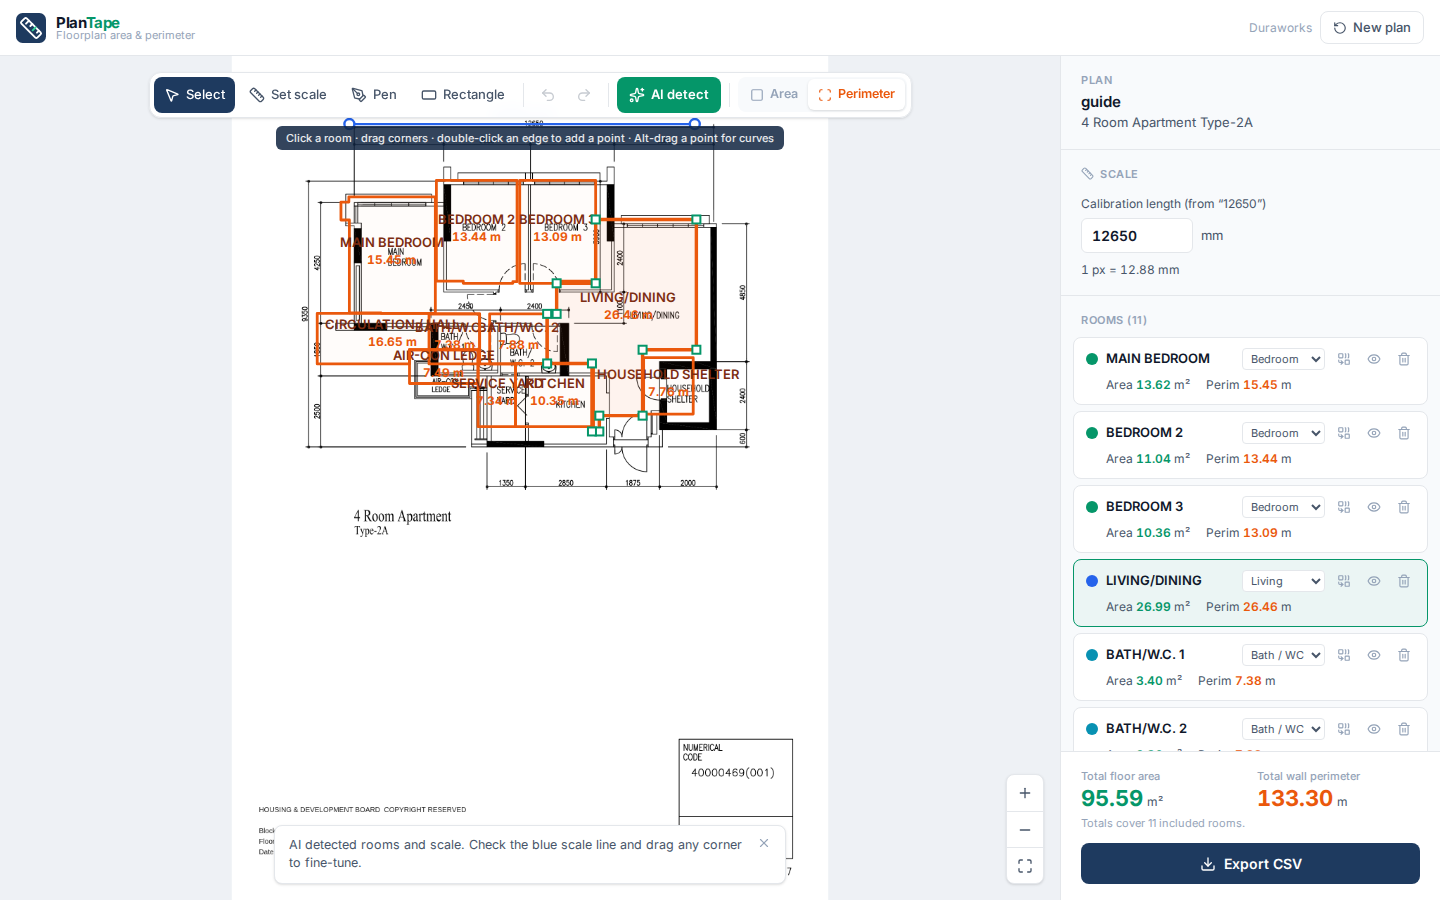
The toggle at the right end of the toolbar switches what the plan shows: Area shades each room with its m², while Perimeter draws bold orange outlines with each room's internal wall perimeter in metres, the view for skirting and wall-finish quotes.
7Export
The two export buttons sit under the totals (bottom-right):
- PDF renders the measured plan — areas and perimeters drawn on the original — on every tier (watermarked on Free).
- CSV downloads a spreadsheet with every room's area and perimeter plus the totals for included rooms — Pro and Business plans.
Rooms you've hidden with the eye icon are listed but excluded from totals.
8Accounts, saved plans & pricing
Without an account you can explore the interactive demo at demo.plantape.app: the full editor on a pre-measured floor plan. To detect rooms on your own plans, sign in (Google, or email + password):
- Free: 1 detection per month, plans saved automatically under My plans, and a measured-plan PDF export (areas and perimeters rendered on the drawing).
- Pro (S$28/month): 28 detections per month plus CSV export for your quoting spreadsheet.
- Business (S$99/month): 150 detections per month, CSV export, and branded quotations coming soon. Upgrade from the user menu (top-right); manage or cancel any time via Manage billing.
Editing, measuring and re-exporting plans you've already detected never costs a detection; the quota only counts detection runs. If a detection fails, it isn't counted.
Shortcuts
| Key | Action |
|---|---|
| V / S / P / R | Select · Set scale · Pen · Rectangle |
| Ctrl+Z / Ctrl+Shift+Z | Undo / Redo |
| Enter / Esc | Close / cancel a Pen drawing (Esc also exits merge mode) |
| Arrow keys (+Shift) | Nudge the selected corner 1 px (10 px) |
| Mouse wheel | Zoom (the +/−/fit buttons are bottom-right) |